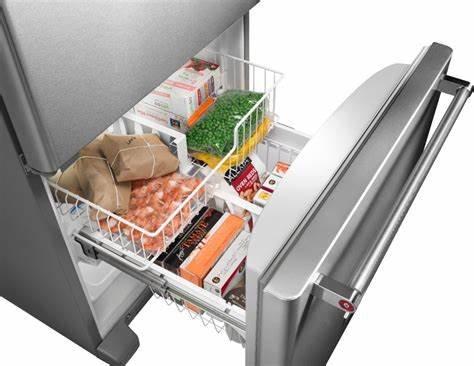
KitchenAid freezers are designed with organization and ease of use in mind, but like any appliance, they require some love and attention now and then. The trays in your freezer are there to help you keep your frozen goods tidy and accessible, but sometimes they need to be taken out, whether it’s for cleaning, defrosting, or adjusting the space to better suit your storage needs.
Before you get started, ensure your freezer is unplugged to avoid any electrical hazards. This is especially important if your freezer has an ice maker or any electronic components.
Remove all items from the freezer trays. This will not only make it easier to take out the trays but will also give you a chance to take stock of what you have and organize accordingly.
If there’s a significant build-up of ice, it’s a good idea to defrost your freezer to prevent damaging the trays or the freezer’s interior. You can speed up this process by placing a fan in front of the open freezer or using a hairdryer on a low setting, but be careful not to use high heat or sharp objects to chip away the ice.
Gently slide the trays out as far as they will go and take a look at how they’re attached. Some trays may rest on brackets and can be lifted straight up and out, while others might have a locking mechanism that needs to be disengaged.
Carefully lift the trays up and out of the brackets or release the locking mechanism according to your specific model. If they don’t come out easily, double-check for any screws or additional locks that might be securing them in place. Consult your KitchenAid manual if you’re unsure.
Cleaning the Freezer Trays
Now that the trays are out, let’s get them sparkling clean. Wash them with warm, soapy water, and if there’s any stubborn residue, a mixture of baking soda and water can be a great gentle abrasive. Rinse them well and dry thoroughly to prevent ice from forming when you put them back in the freezer.
Before you slide the trays back into place, make sure they are entirely dry. Align them with the brackets or tracks and gently lower them back in. If there’s a locking mechanism, make sure it clicks or locks into place, securing the tray.
A: A good rule of thumb is to clean your freezer trays every 3 to 6 months, or whenever you notice any spills or residue.
A: Some freezer trays may be dishwasher safe, but it’s best to consult your model’s user manual or KitchenAid’s customer service to be sure.
A: Make sure all ice is defrosted and that you’ve released any locks or mechanisms. If they’re still stuck, there may be concealed screws or clips – refer to your user manual for guidance.
A: Replacement trays can be ordered directly from KitchenAid or through authorized retailers. Have your freezer’s model number handy to ensure compatibility.
Troubleshooting Freezer Tray Removal
If you’re facing difficulties with removing your freezer trays, here are a few extra tips:
Mastering the simple art of removing and cleaning your freezer trays isHey there, friends and fellow food safety enthusiasts at TheFoodSafetyDad.com!
Today, we’re diving deep into the frosty world of freezers, specifically focusing on those shiny KitchenAid models that keep our favorite frozen treats and ingredients at the perfect chilly temperature. If you’re like me, you want to keep everything clean and running smoothly, which sometimes means we’ve got to roll up our sleeves and do a bit of maintenance. And one of the key tasks? Removing those freezer trays!
